Making Your First Game
We’ll build a simple game from scratch. By the end of this tutorial you’ll have:
- A decorated map
- An intro dialogue message
- An interactable NPC that talks back
Project Setup
Section titled “Project Setup”First, let’s set up your project.
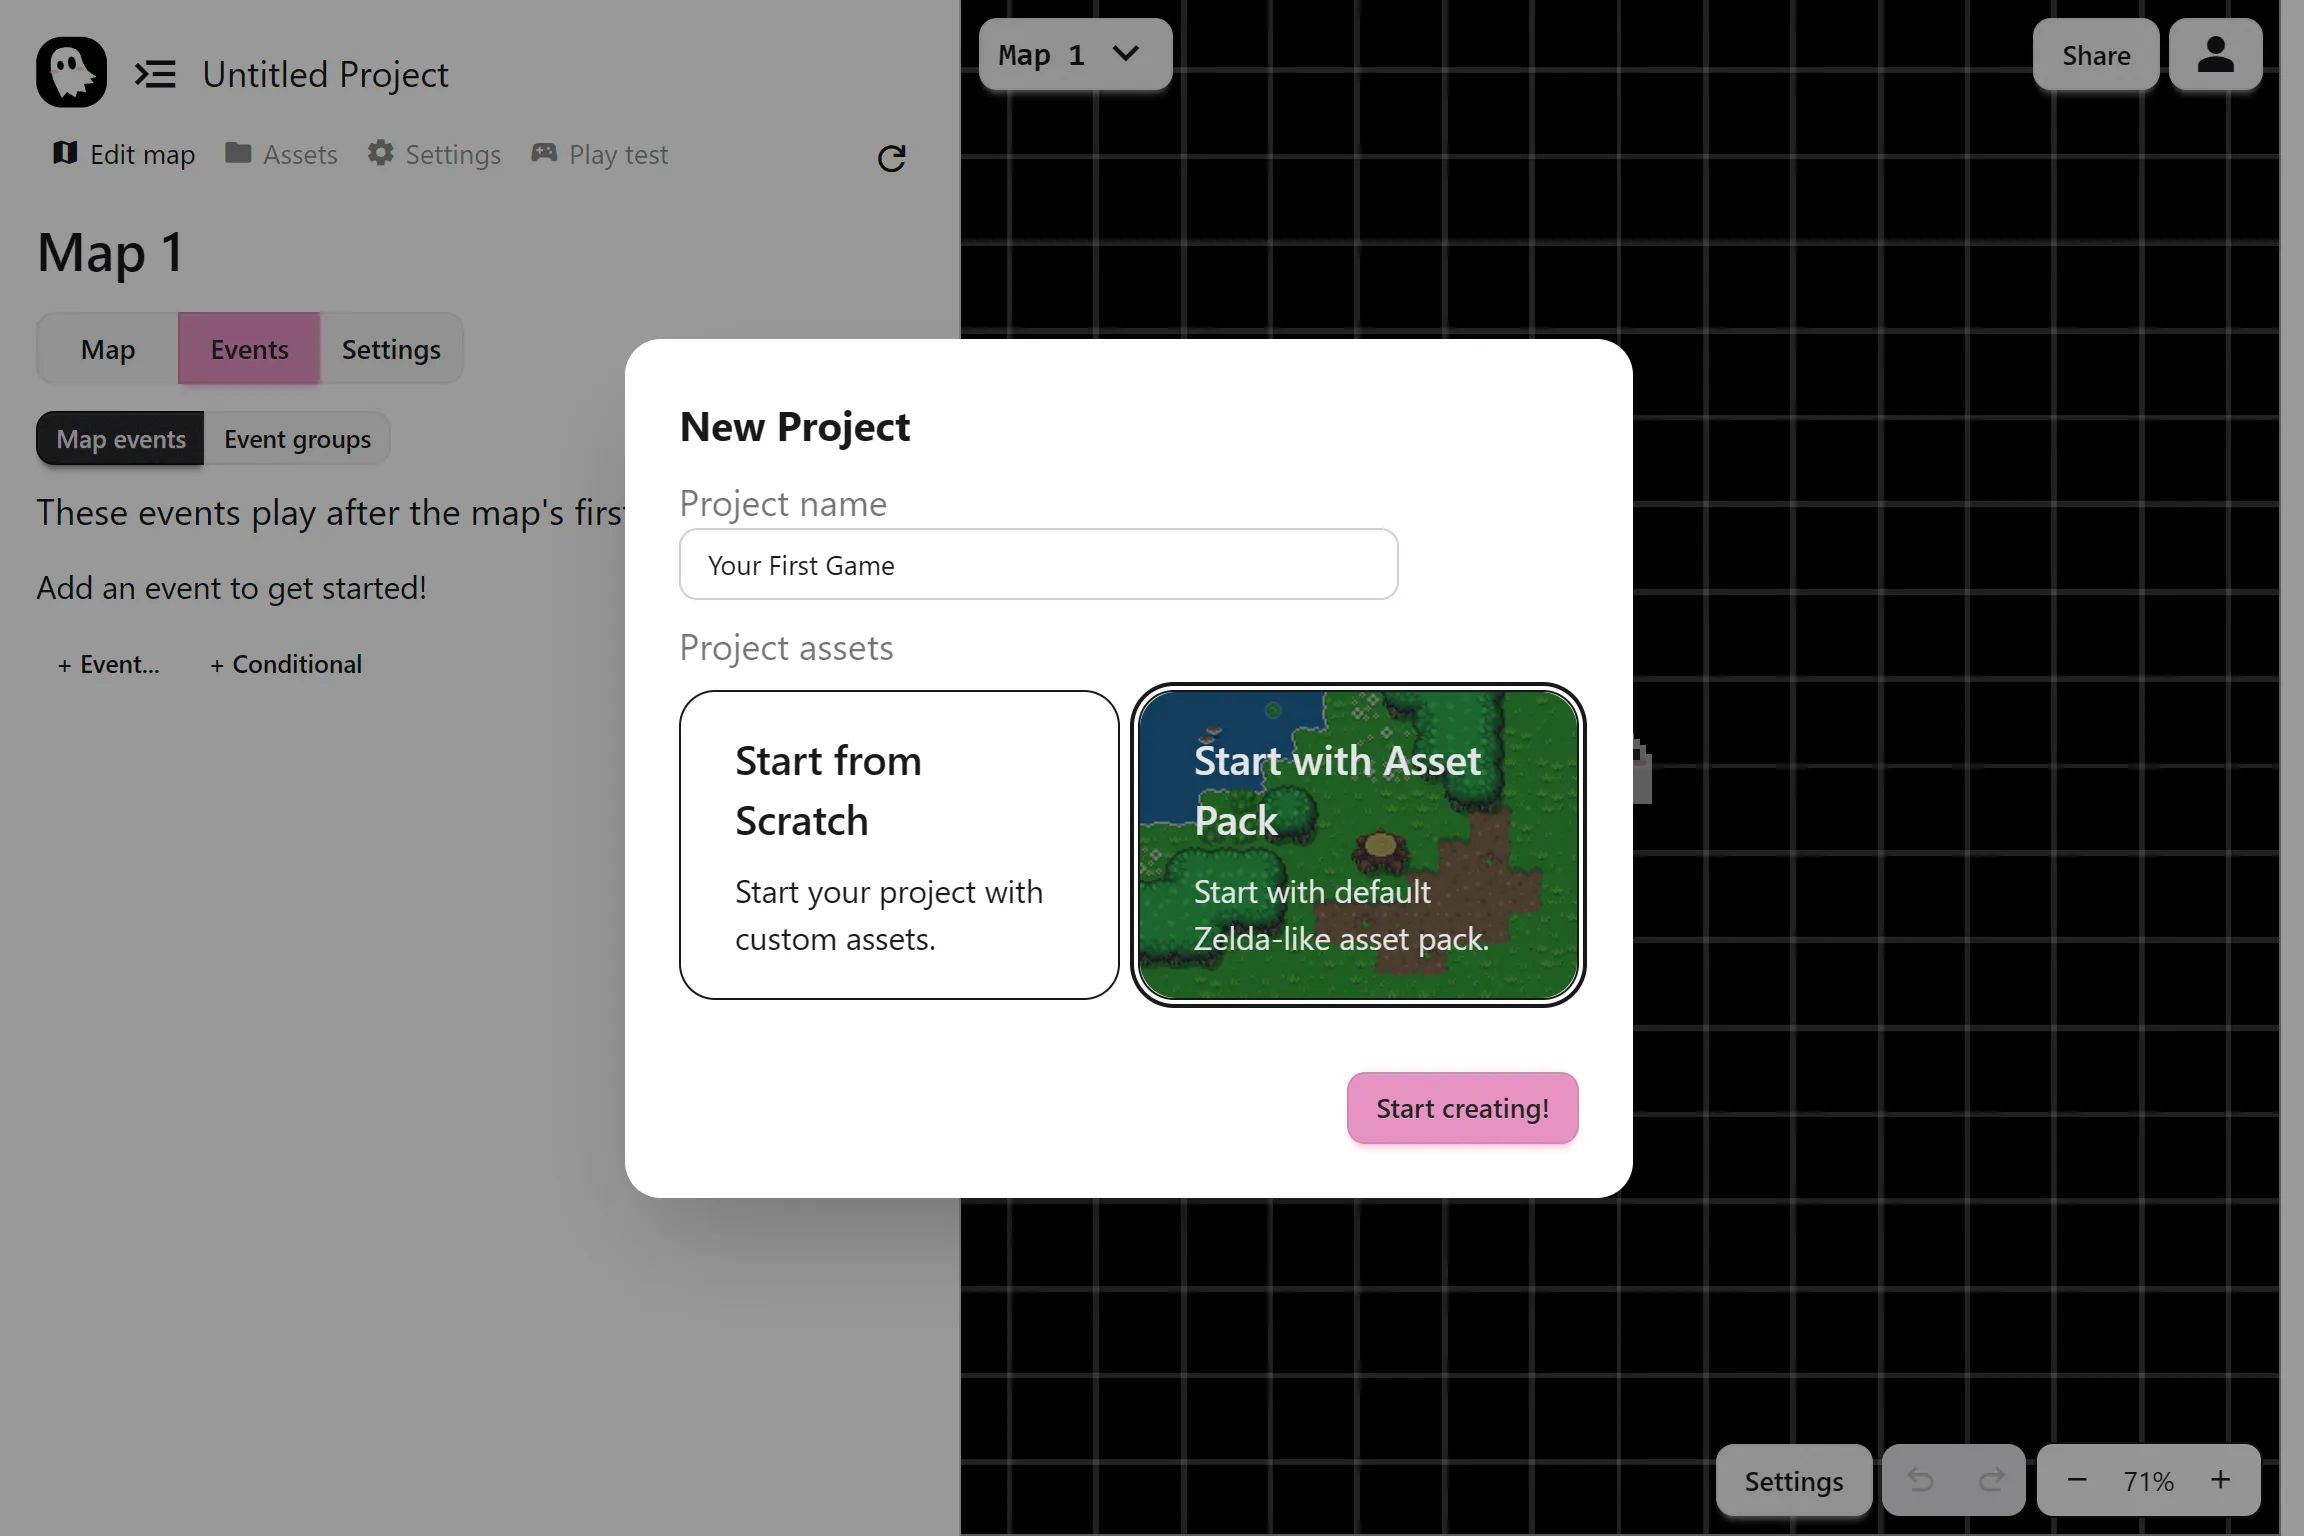
- Open the PS Maker editor
- Create an account.
- Create a new project, with default asset pack.
Building a Map
Section titled “Building a Map”A game needs a world. We’ll create a small starting map using the built-in assets.
Draw the Terrain
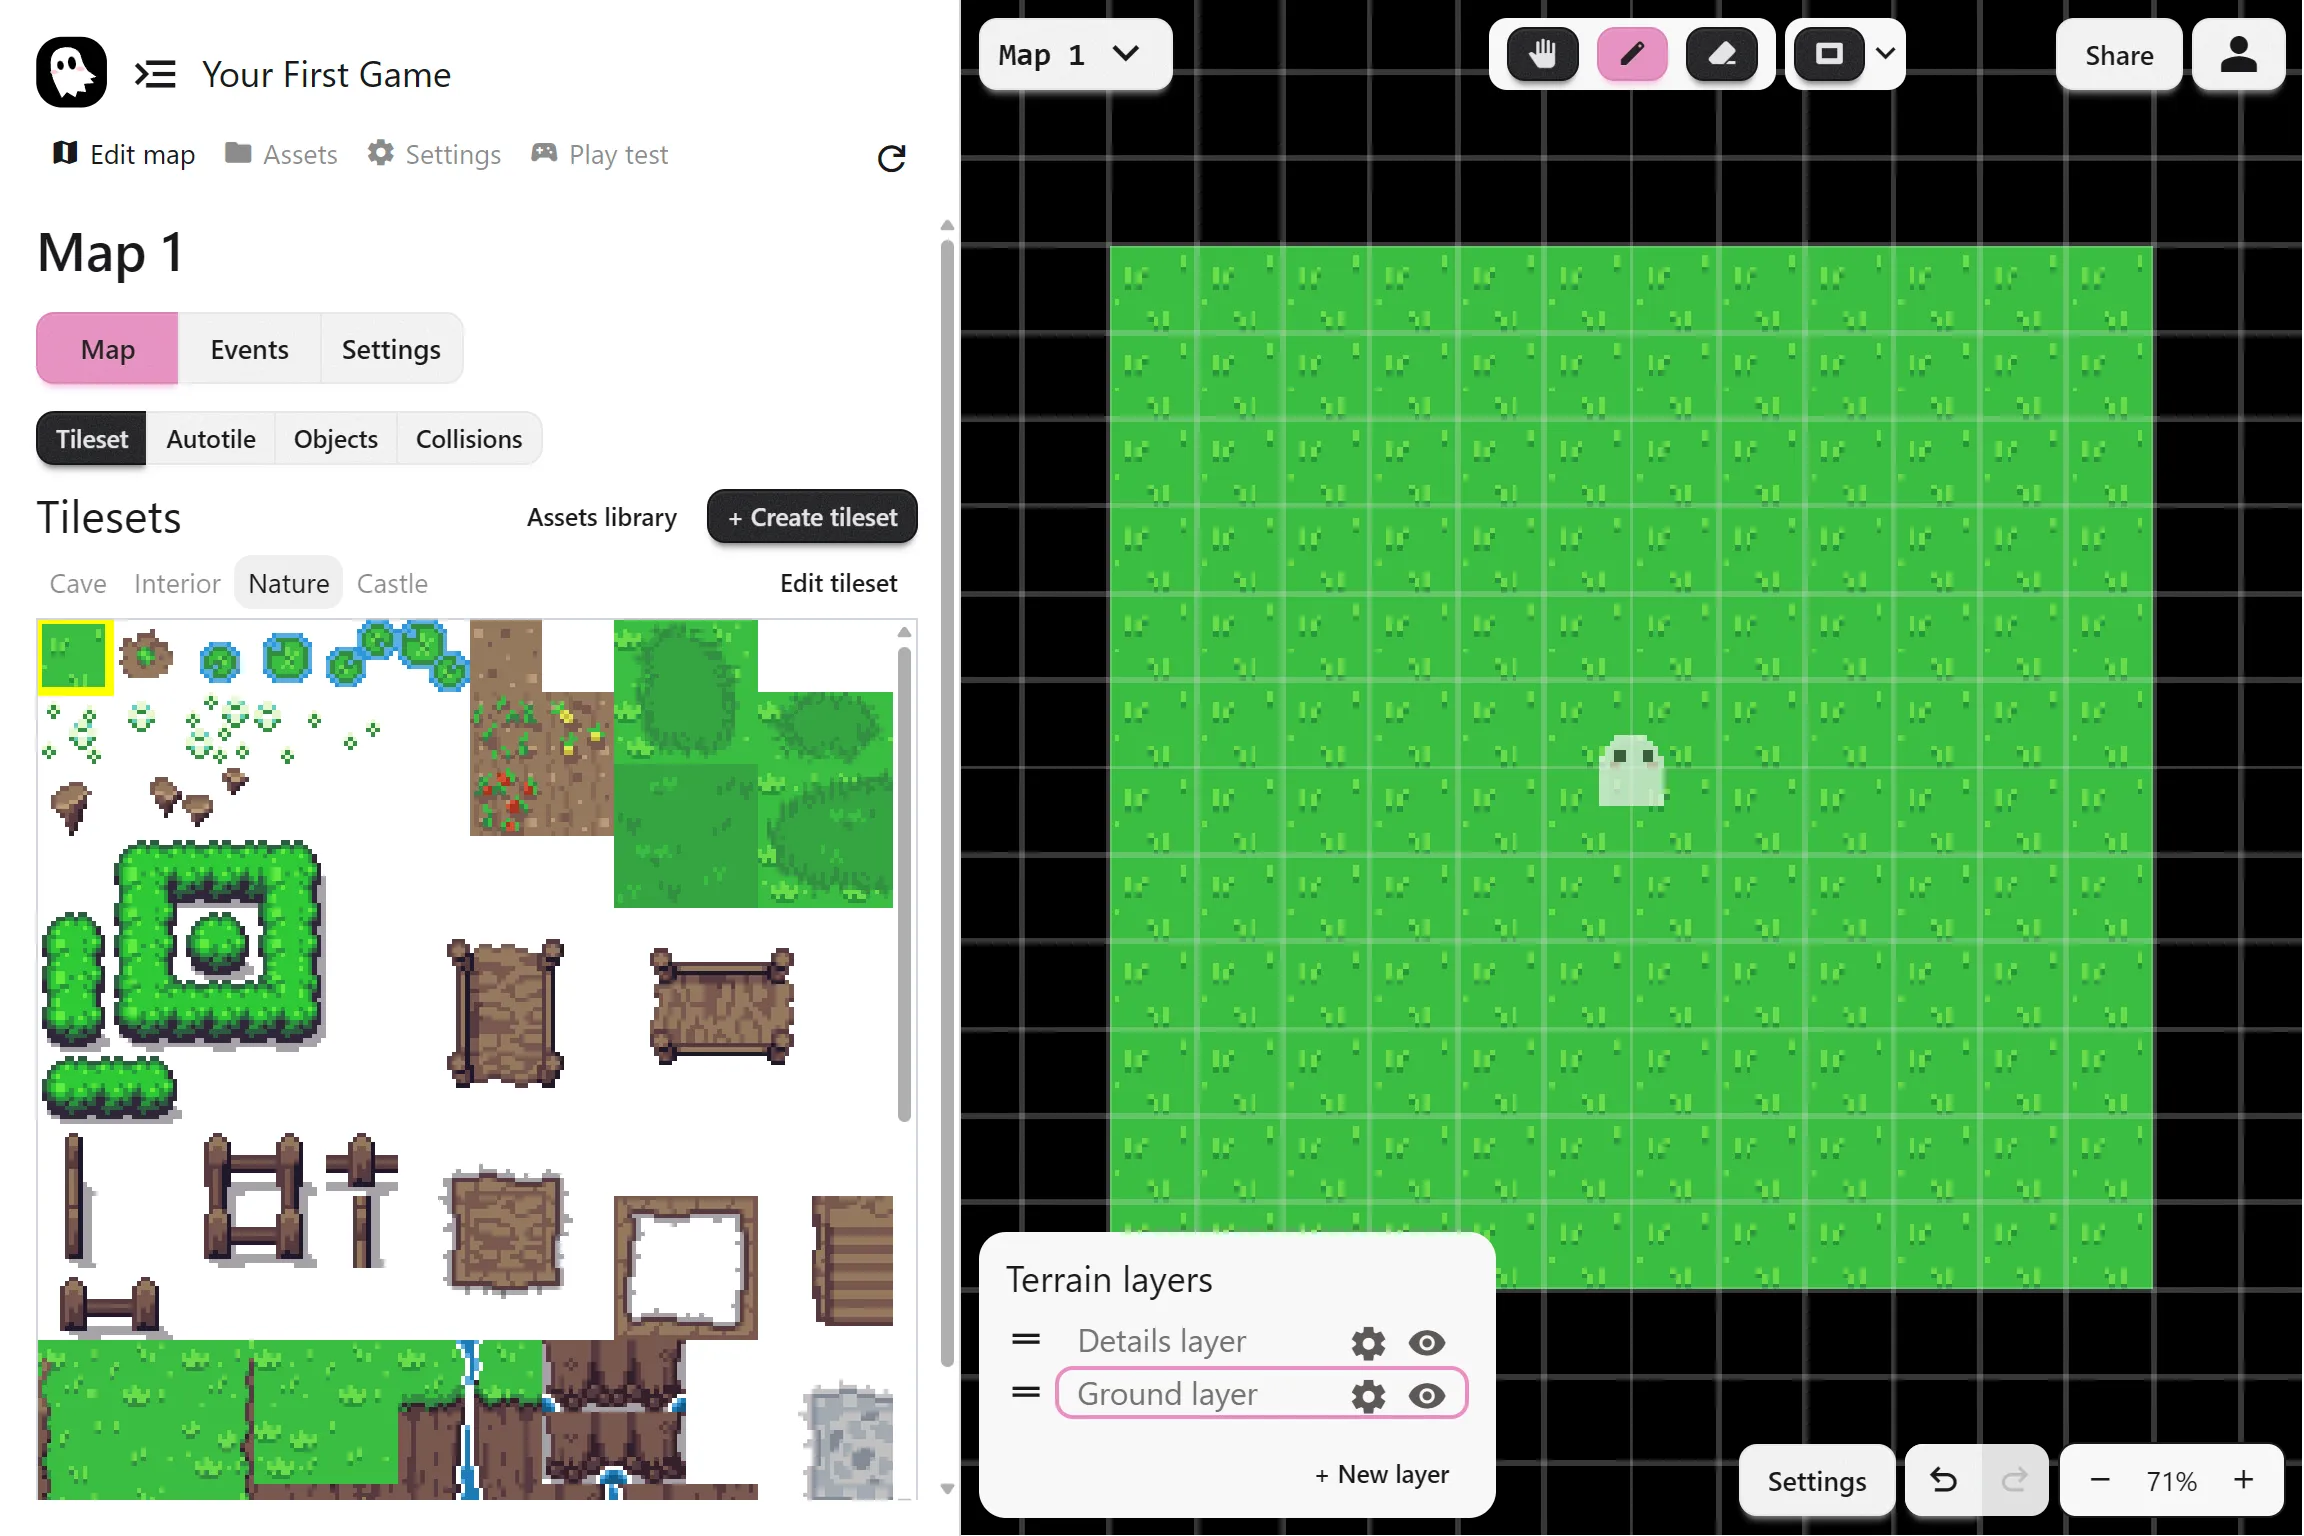
Section titled “Draw the Terrain”- Go to Edit Map > Tilesets.
- Select the grass tile.
- Select the rectangle shape, and paint the ground of your map.
The top toolbar is where you’ll find all the tools for the tab you are on. Right now, we see the tileset draw and erase tools.
Place Objects
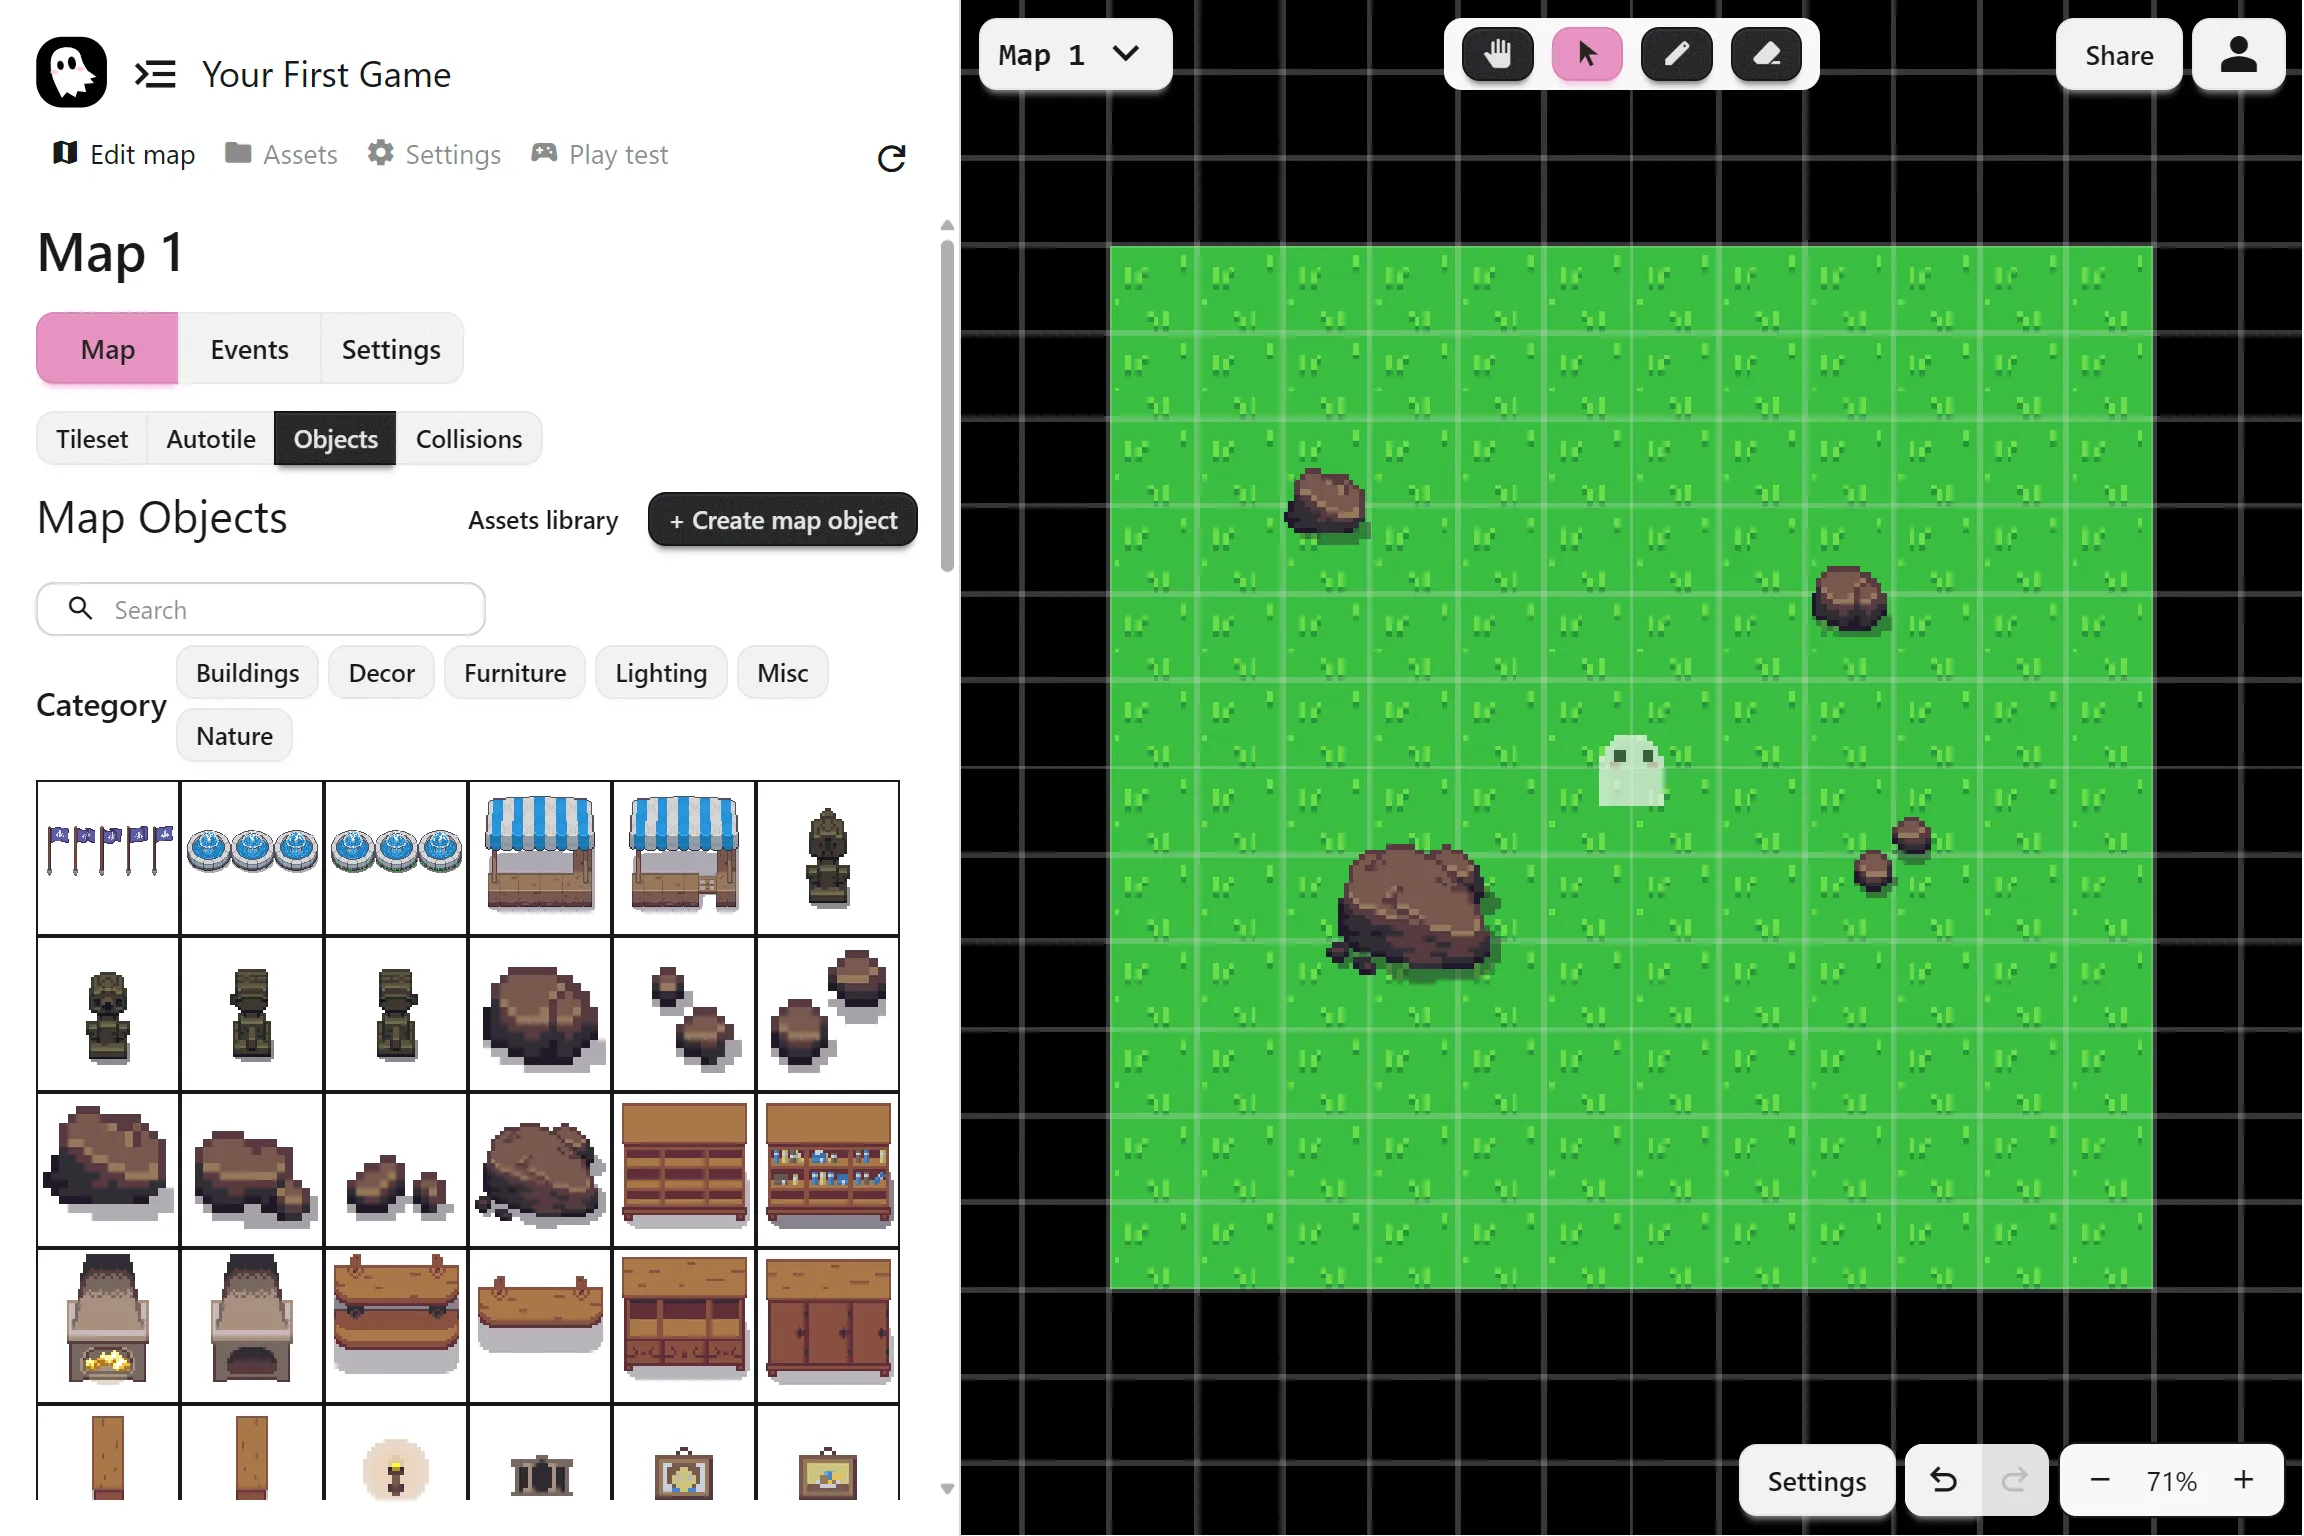
Section titled “Place Objects”- Switch to Edit Map > Objects.
- Select a rock and add a few into the map.
Similar to the tileset tools, you can find the map object tools. Besides place and erase, you’ll also find a select tool that can move the objects around.
Your First Event
Section titled “Your First Event”Before we add NPCs or interactions, let’s try a simple dialogue event. This will show a message as soon as the map loads, so you can see how events run in sequence.
Add a dialogue Event
Section titled “Add a dialogue Event”- Go to Events > Map Events.
- Click + Events… and select dialogue.
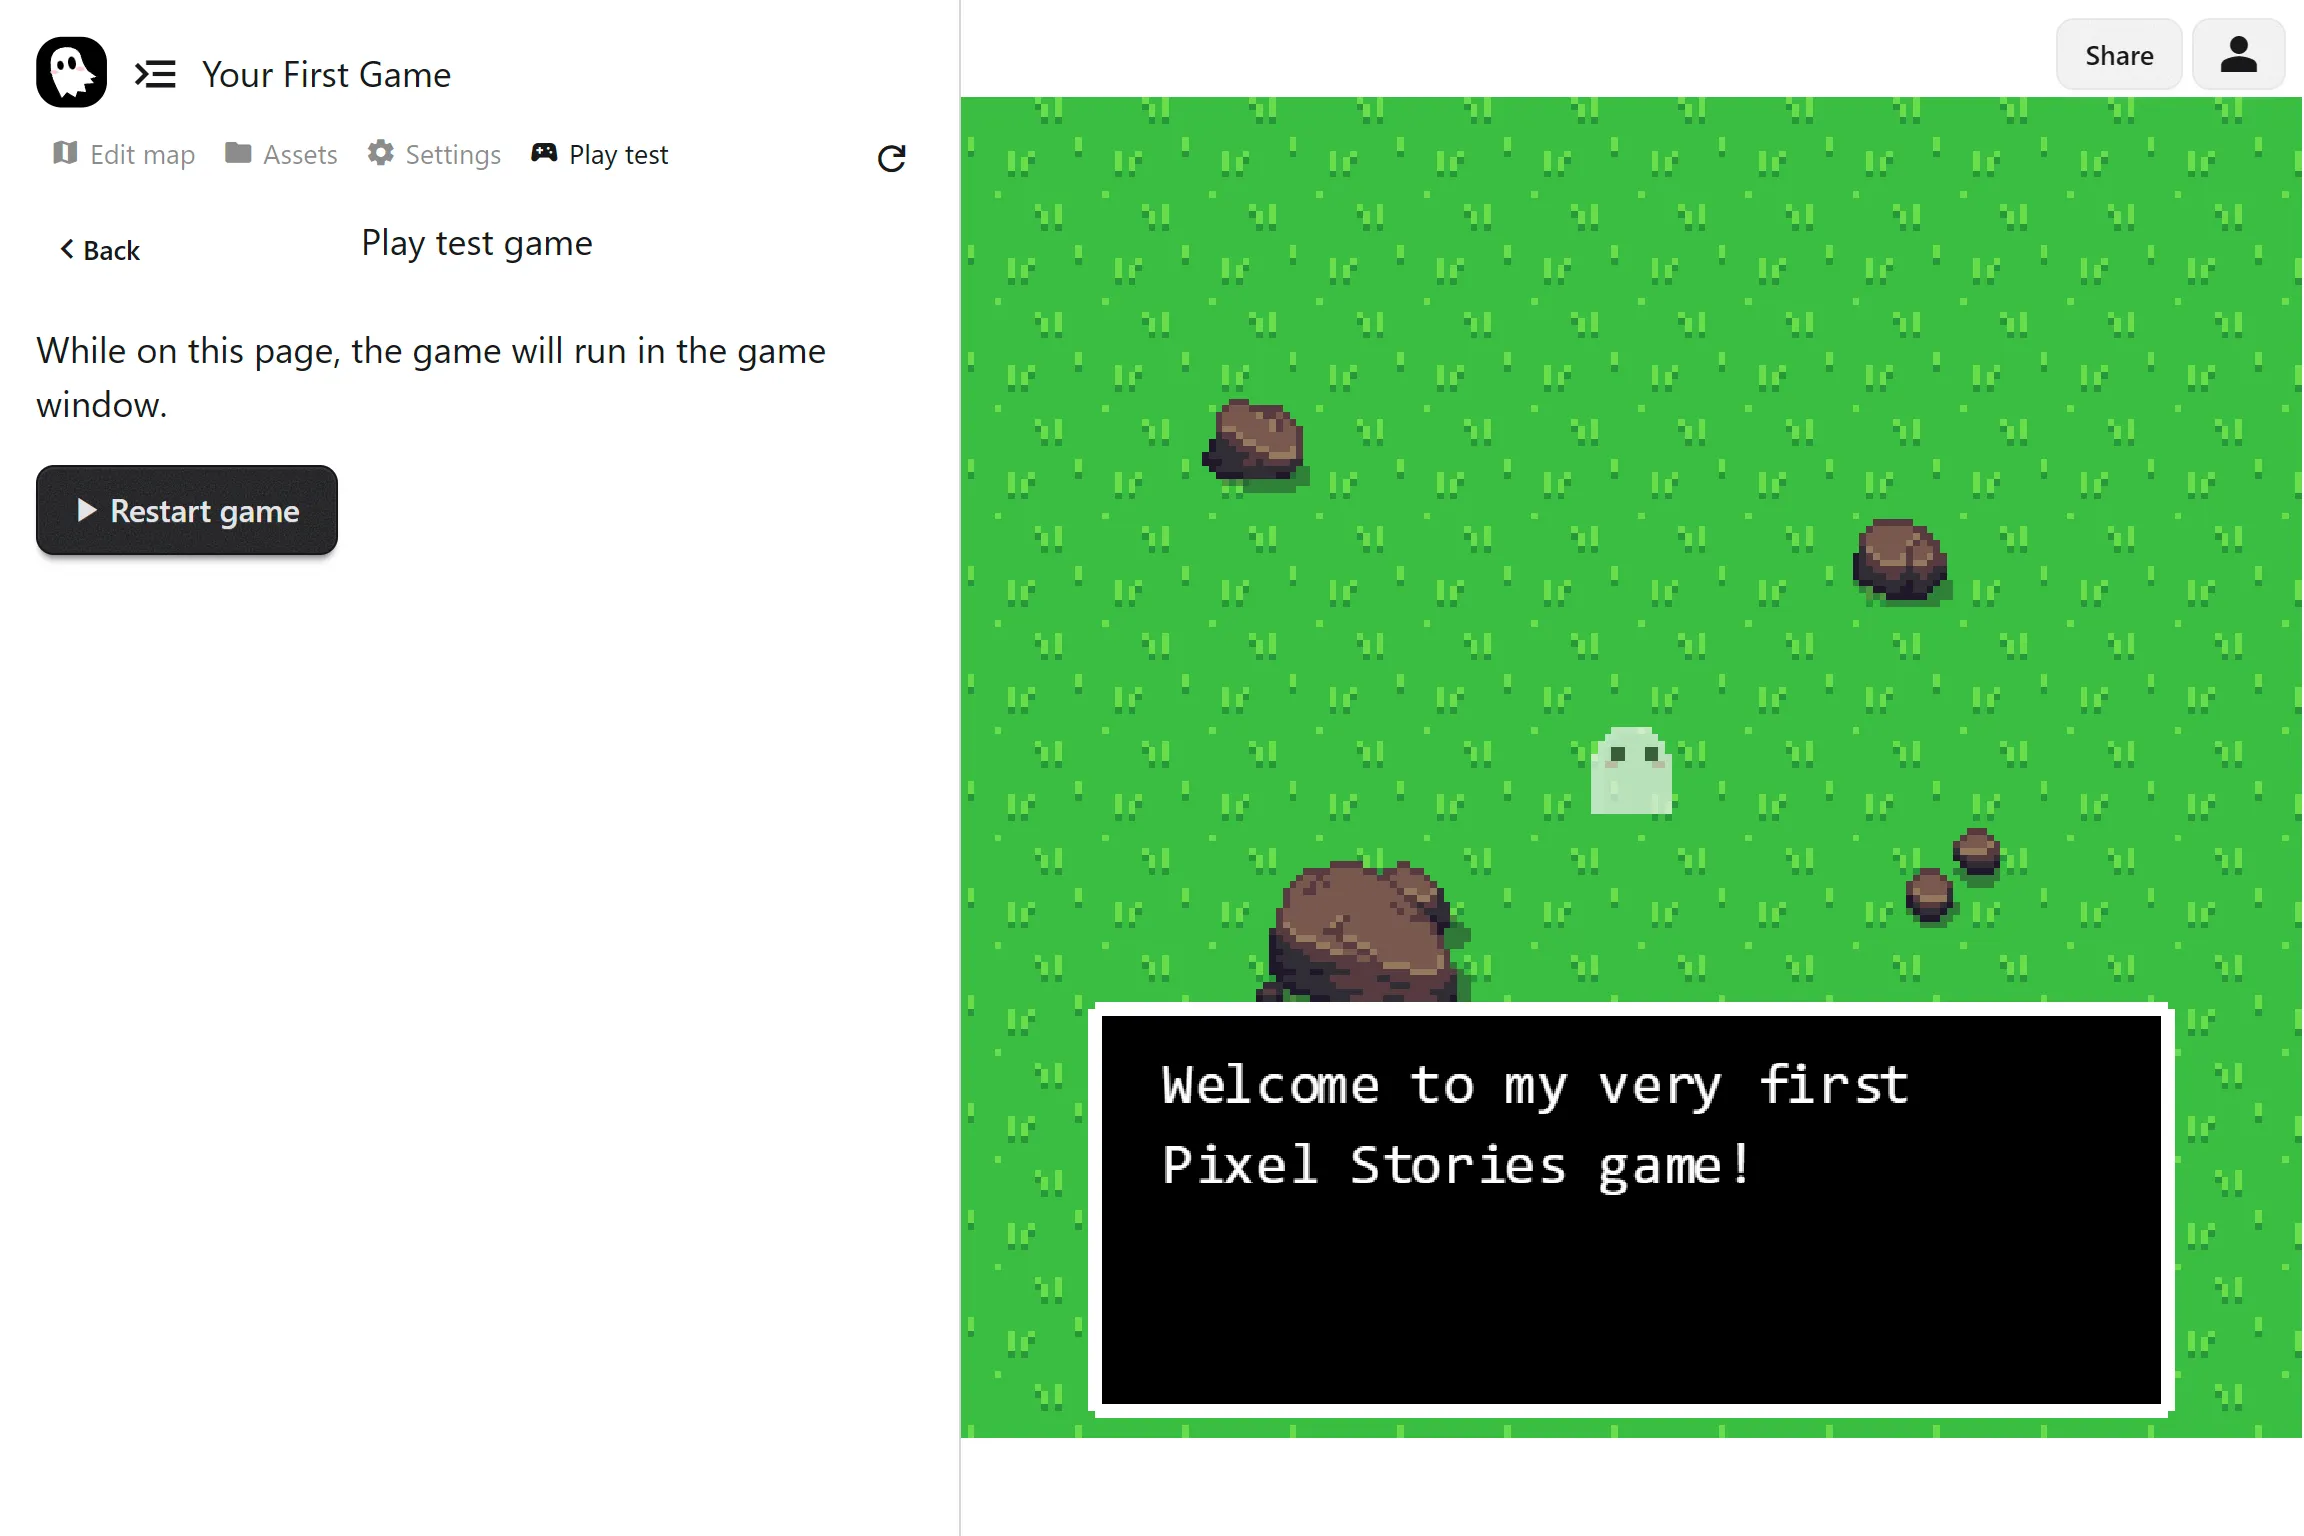
- In the text box, type a short message, for example:
Welcome to my very first PS Maker game!- Go to the Play test page. As soon as the map loads, the dialogue will appear.
Adding an NPC
Section titled “Adding an NPC”Next we’ll add a character who can speak with the player.
Create an NPC
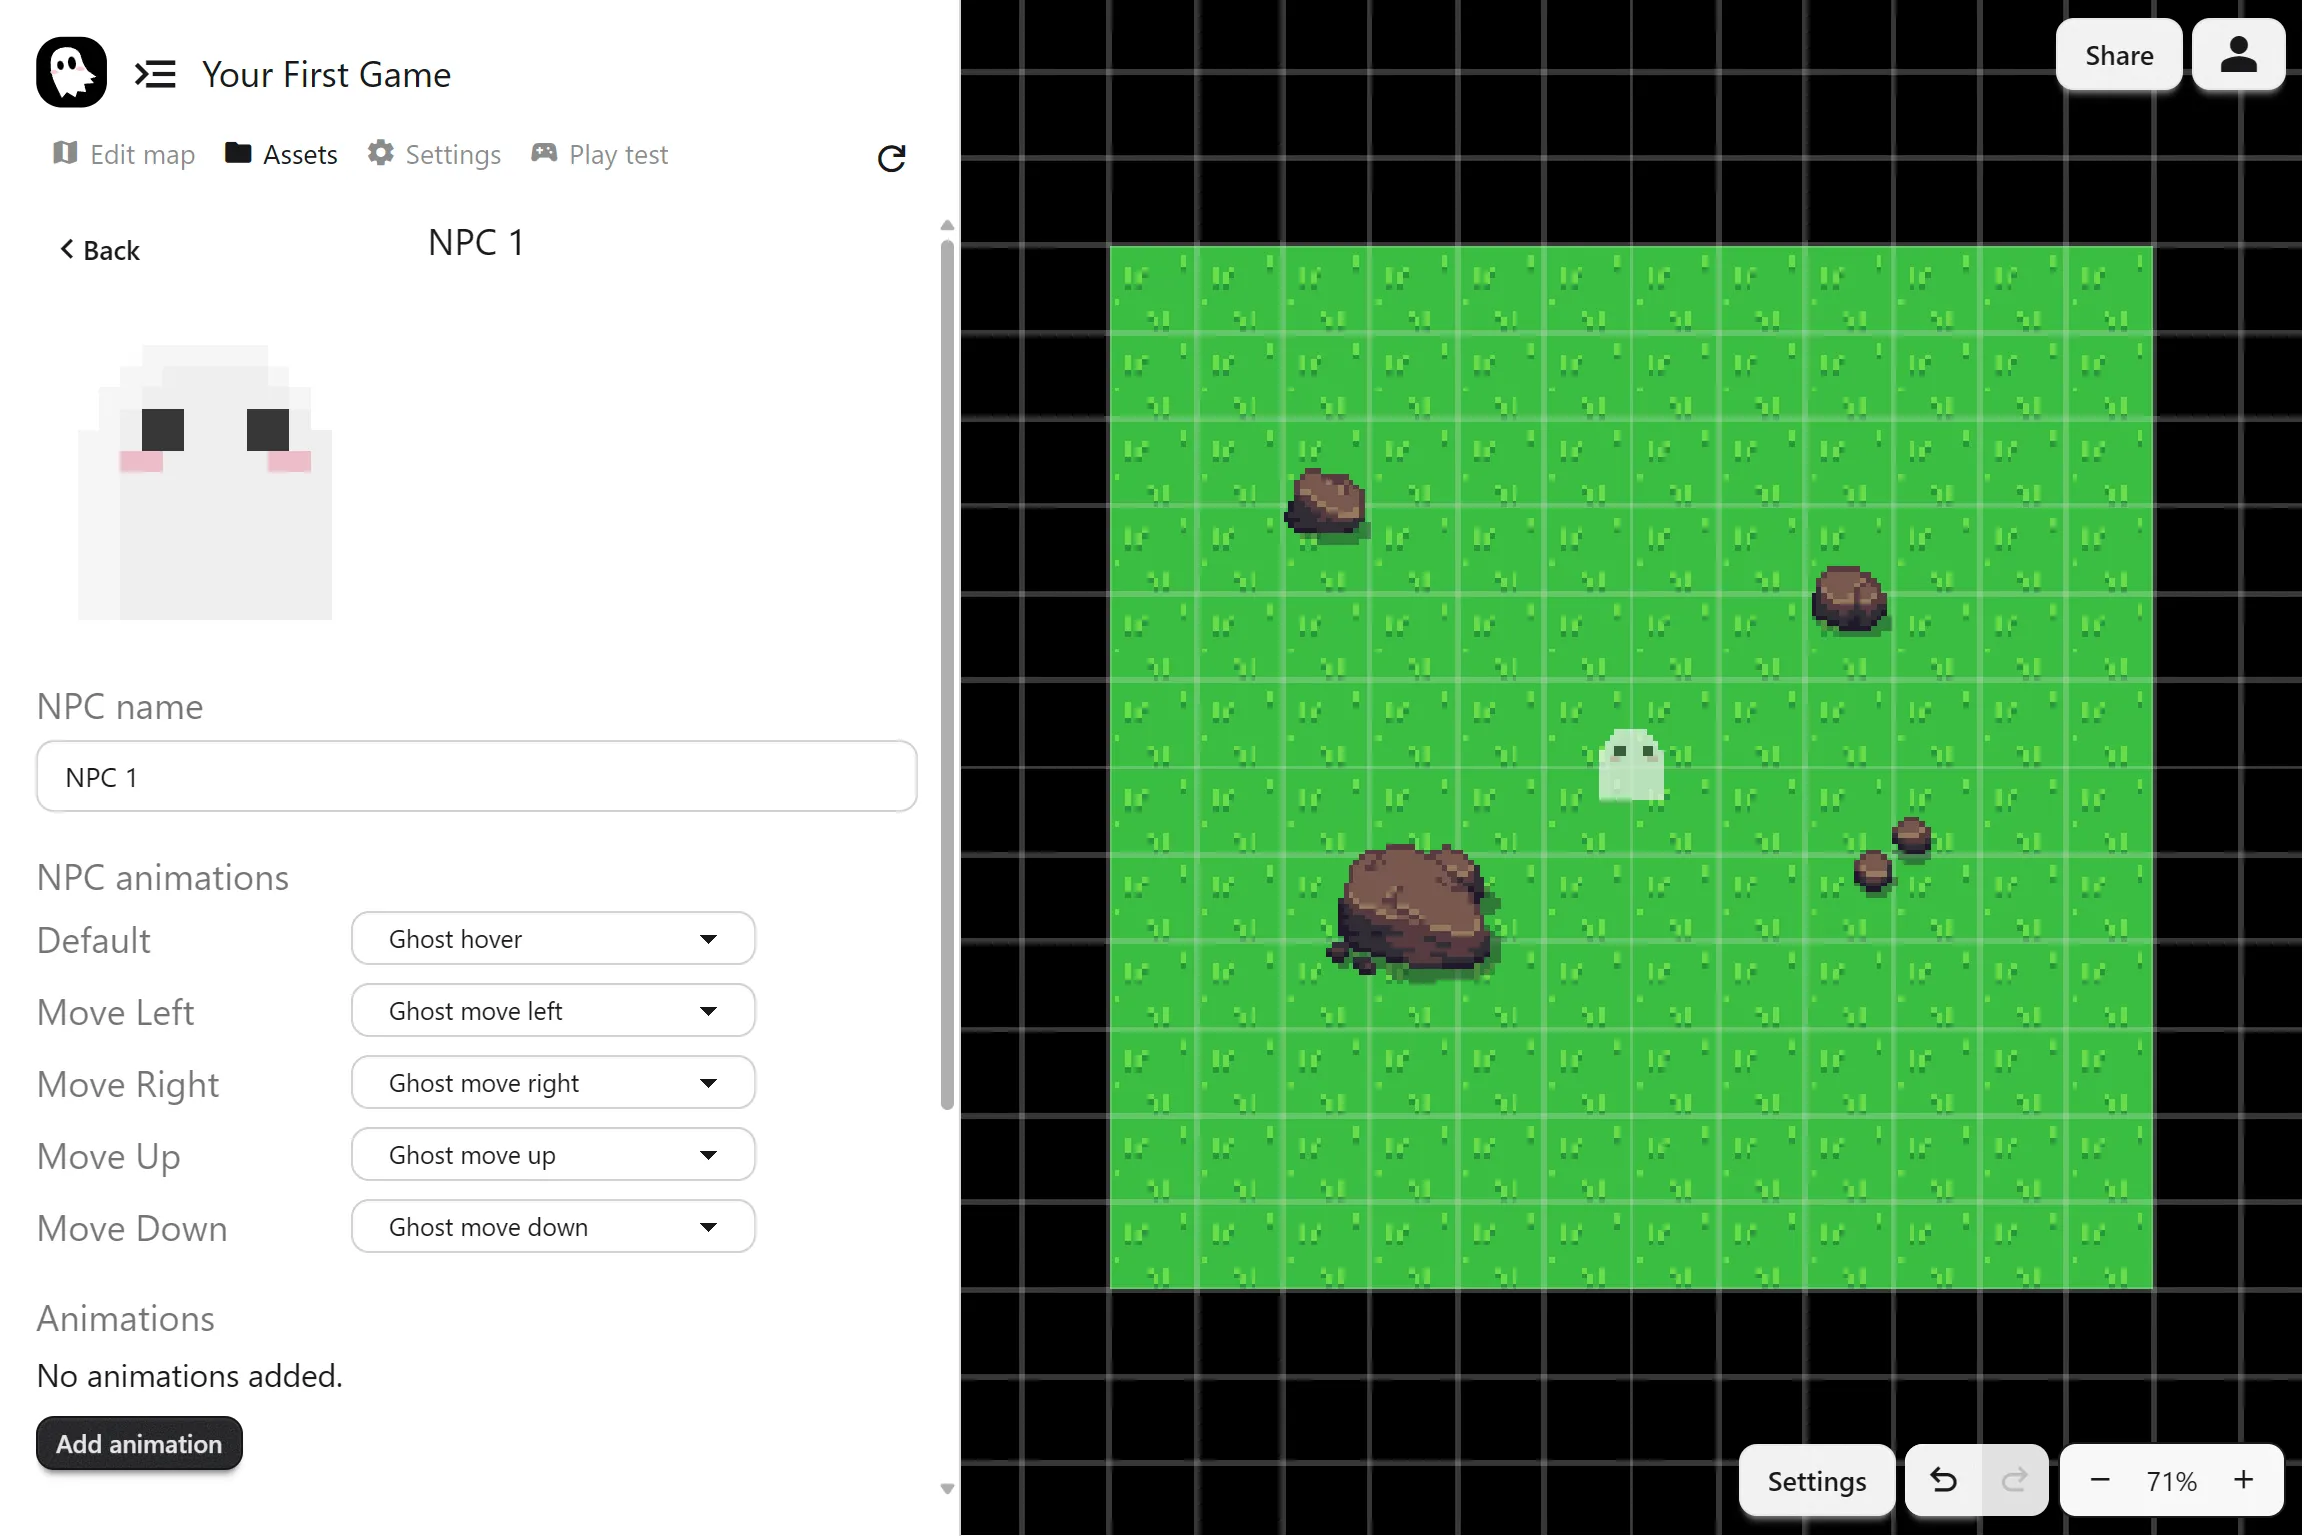
Section titled “Create an NPC”- Go to the Assets > NPCs page.
- Click Add NPC.
- Name it “Ghost friend”
- Set each movement animation to the default ghost animation.
Spawn the NPC
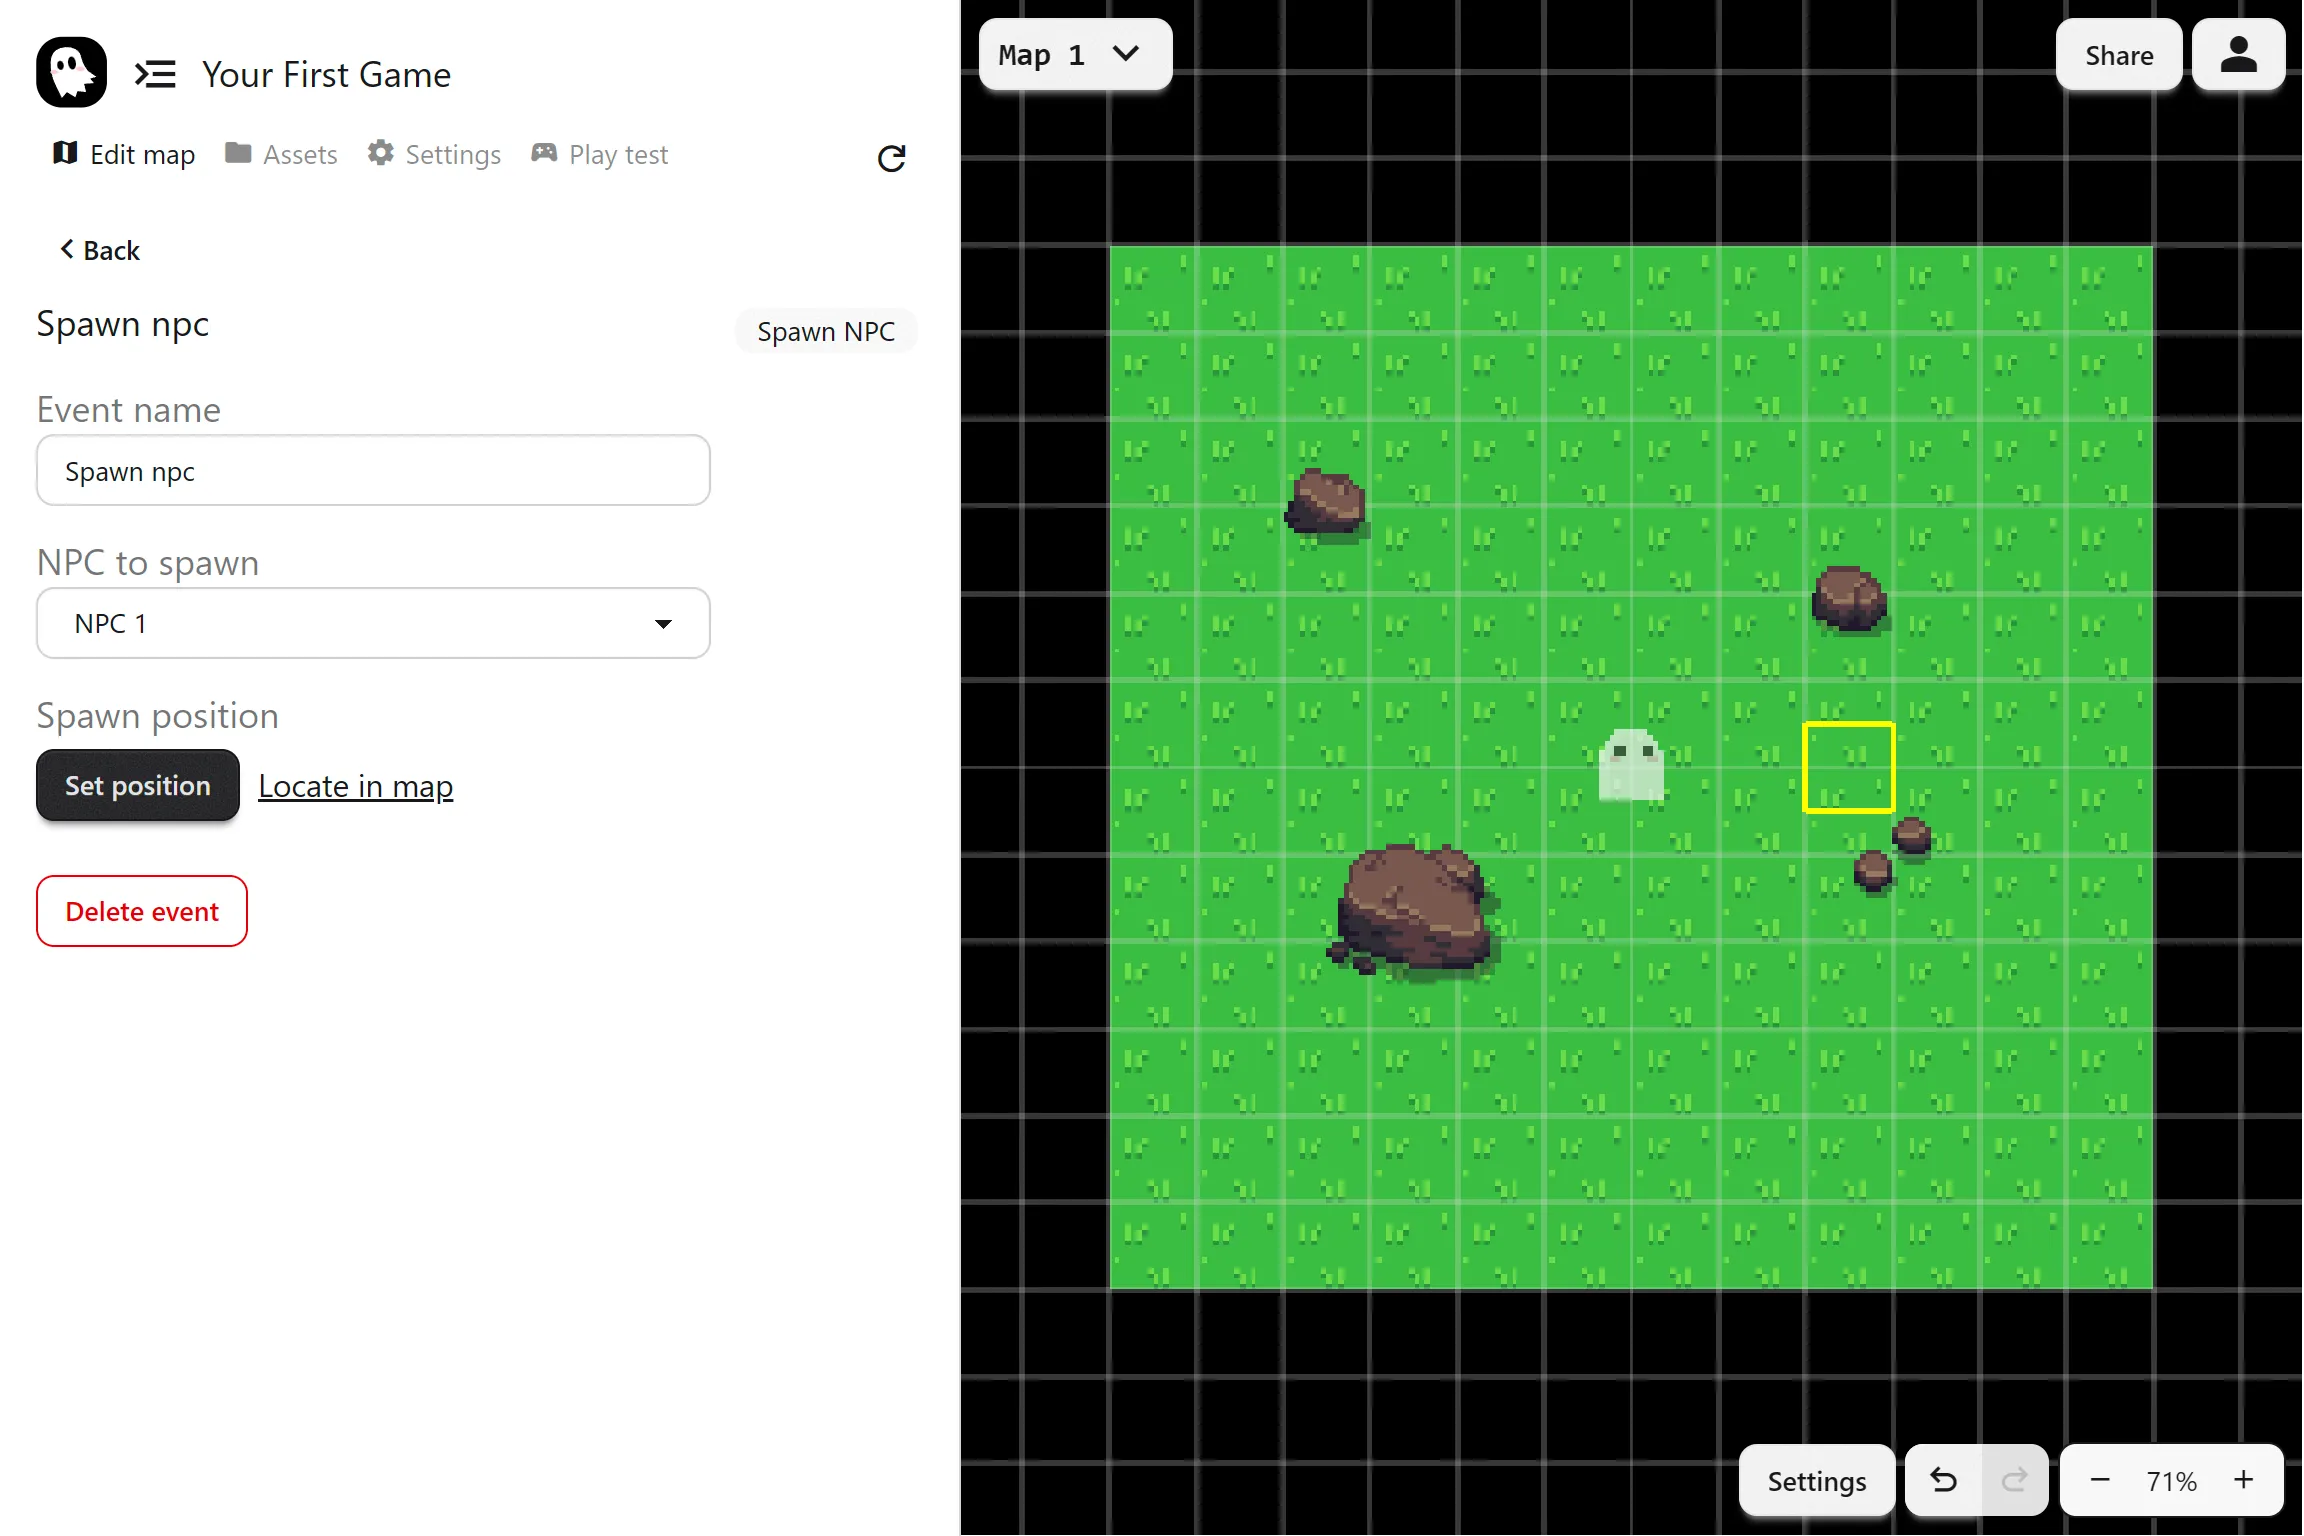
Section titled “Spawn the NPC”- Go back to the Edit map page.
- In Events > Map Events, add a Spawn NPC event.
You’ll find it under the Manage NPCs section - Select “Ghost friend” as the NPC to spawn
Click to set a position on the map.
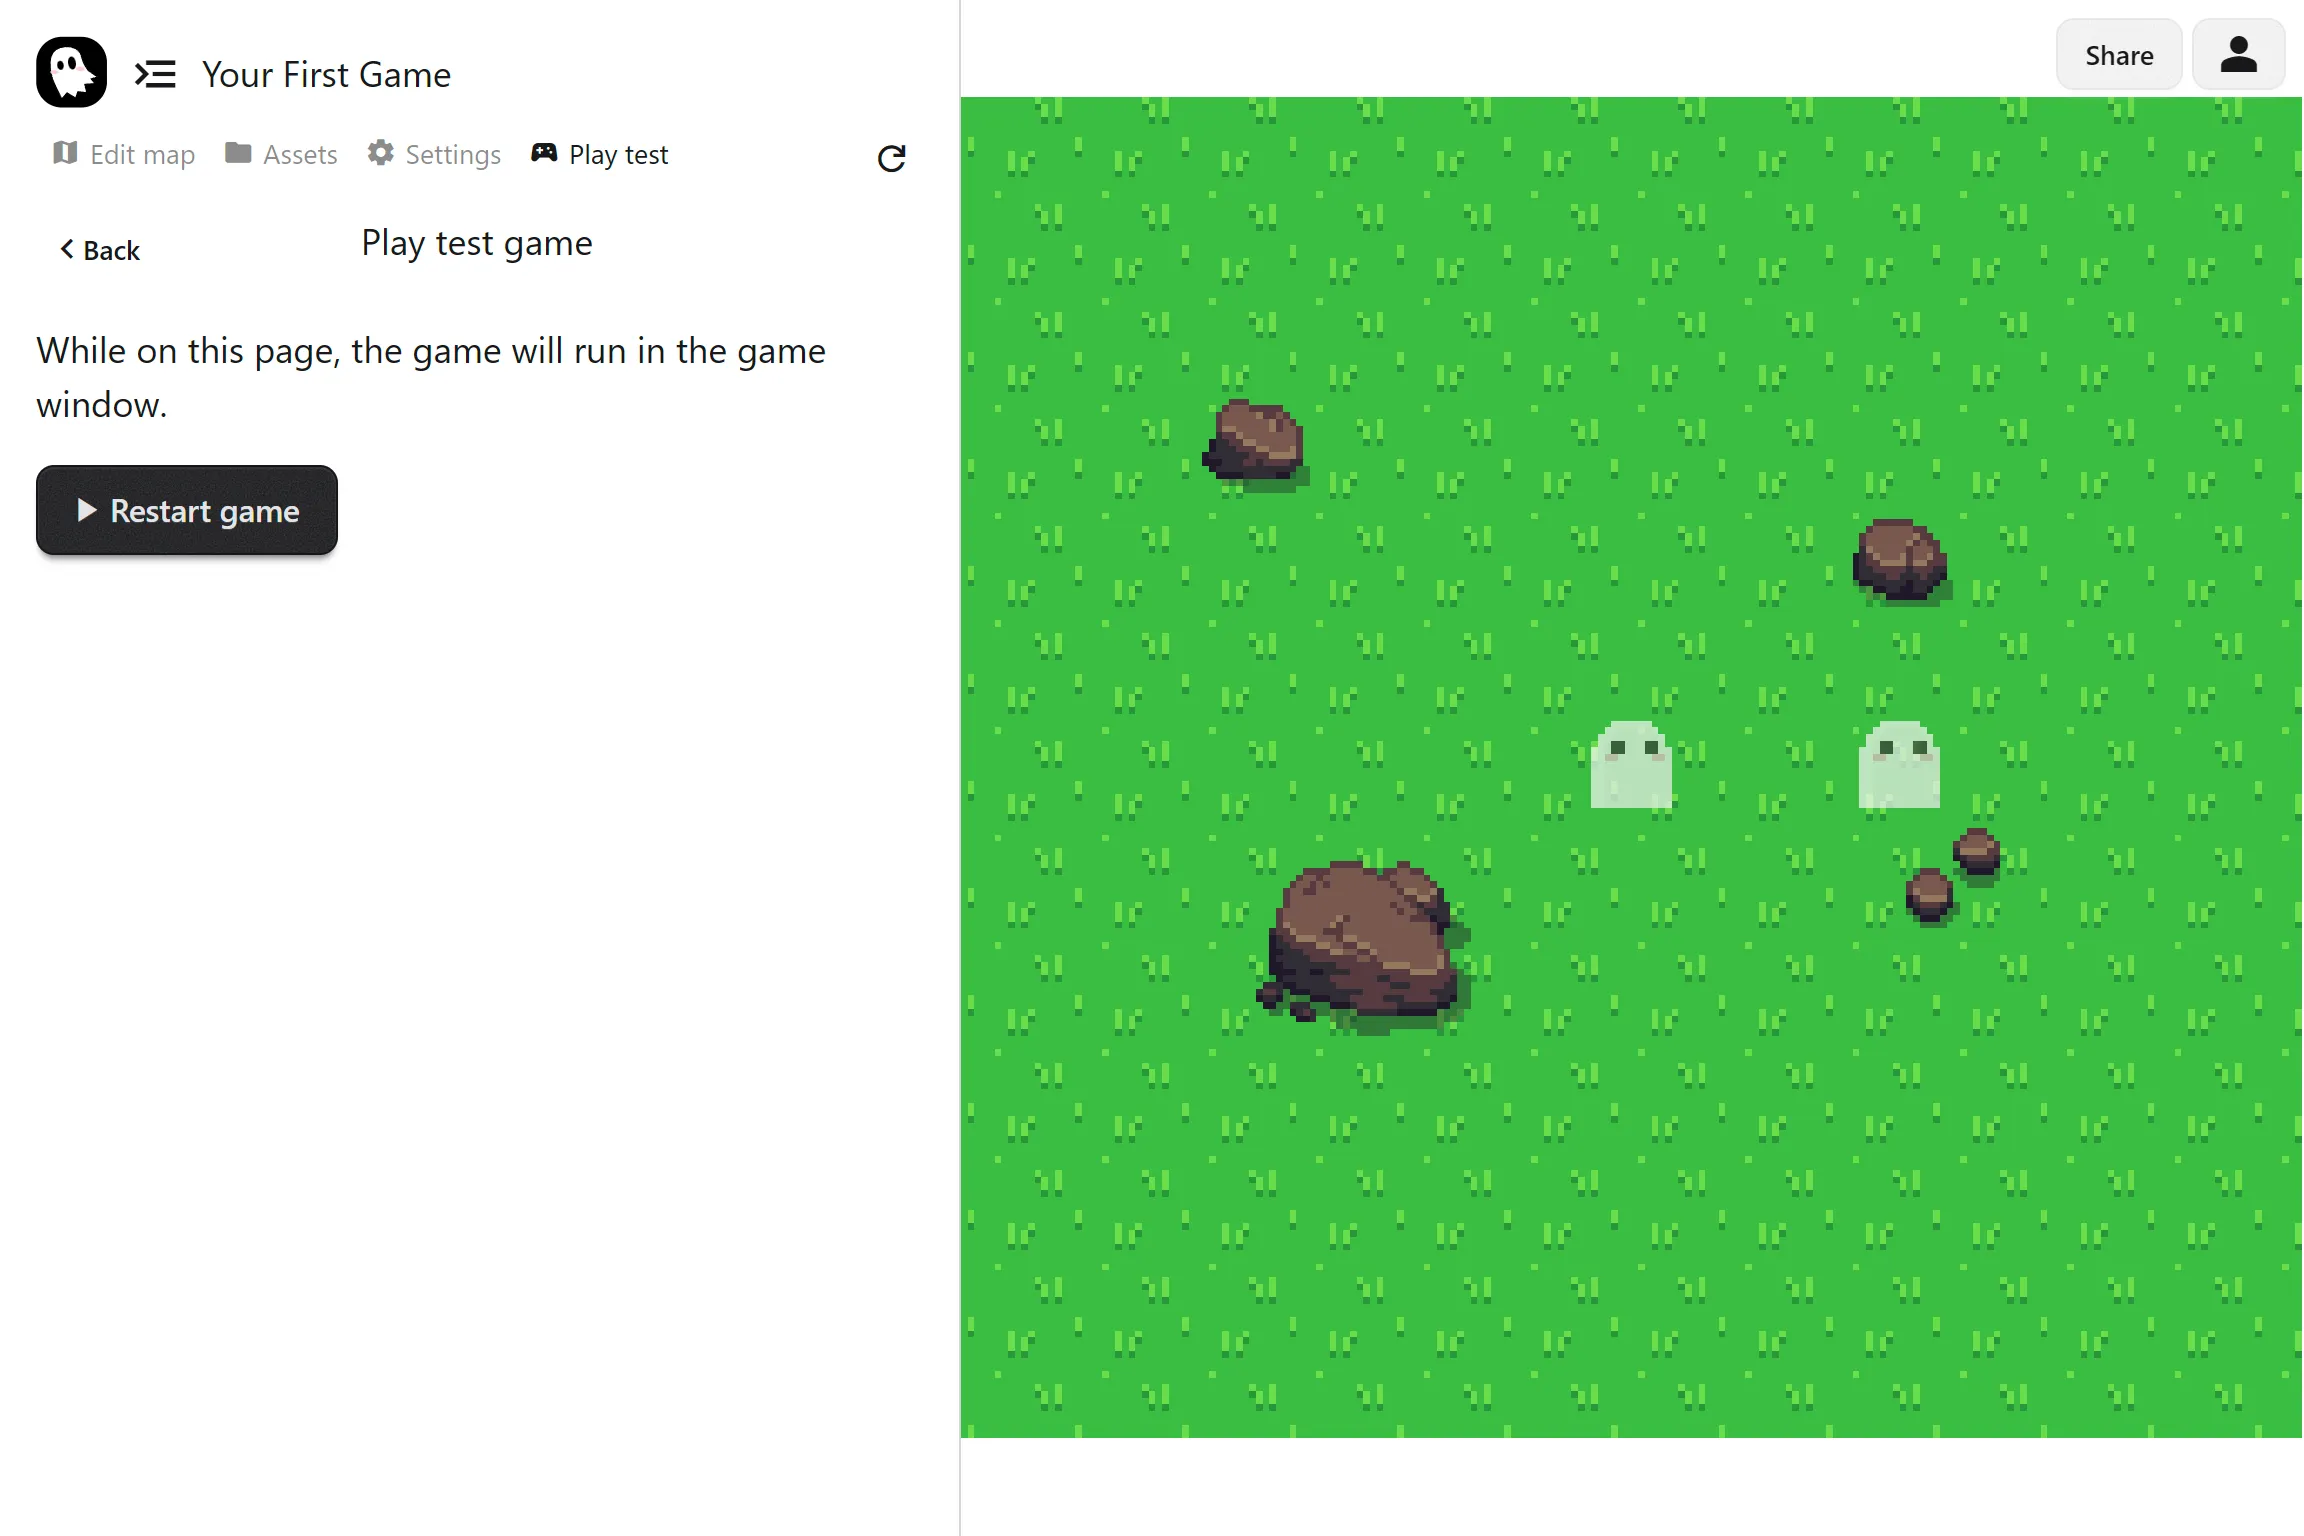
When you run the game from the Play test page, the NPC will appear.
dialogue With the NPC
Section titled “dialogue With the NPC”We’ll make the NPC speak when the player interacts.
Create an Event Group
Section titled “Create an Event Group”- Go to Events > Event Groups.
- Create a new group called
Talk to Ghost friend. - Add a dialogue event with some text, for example:
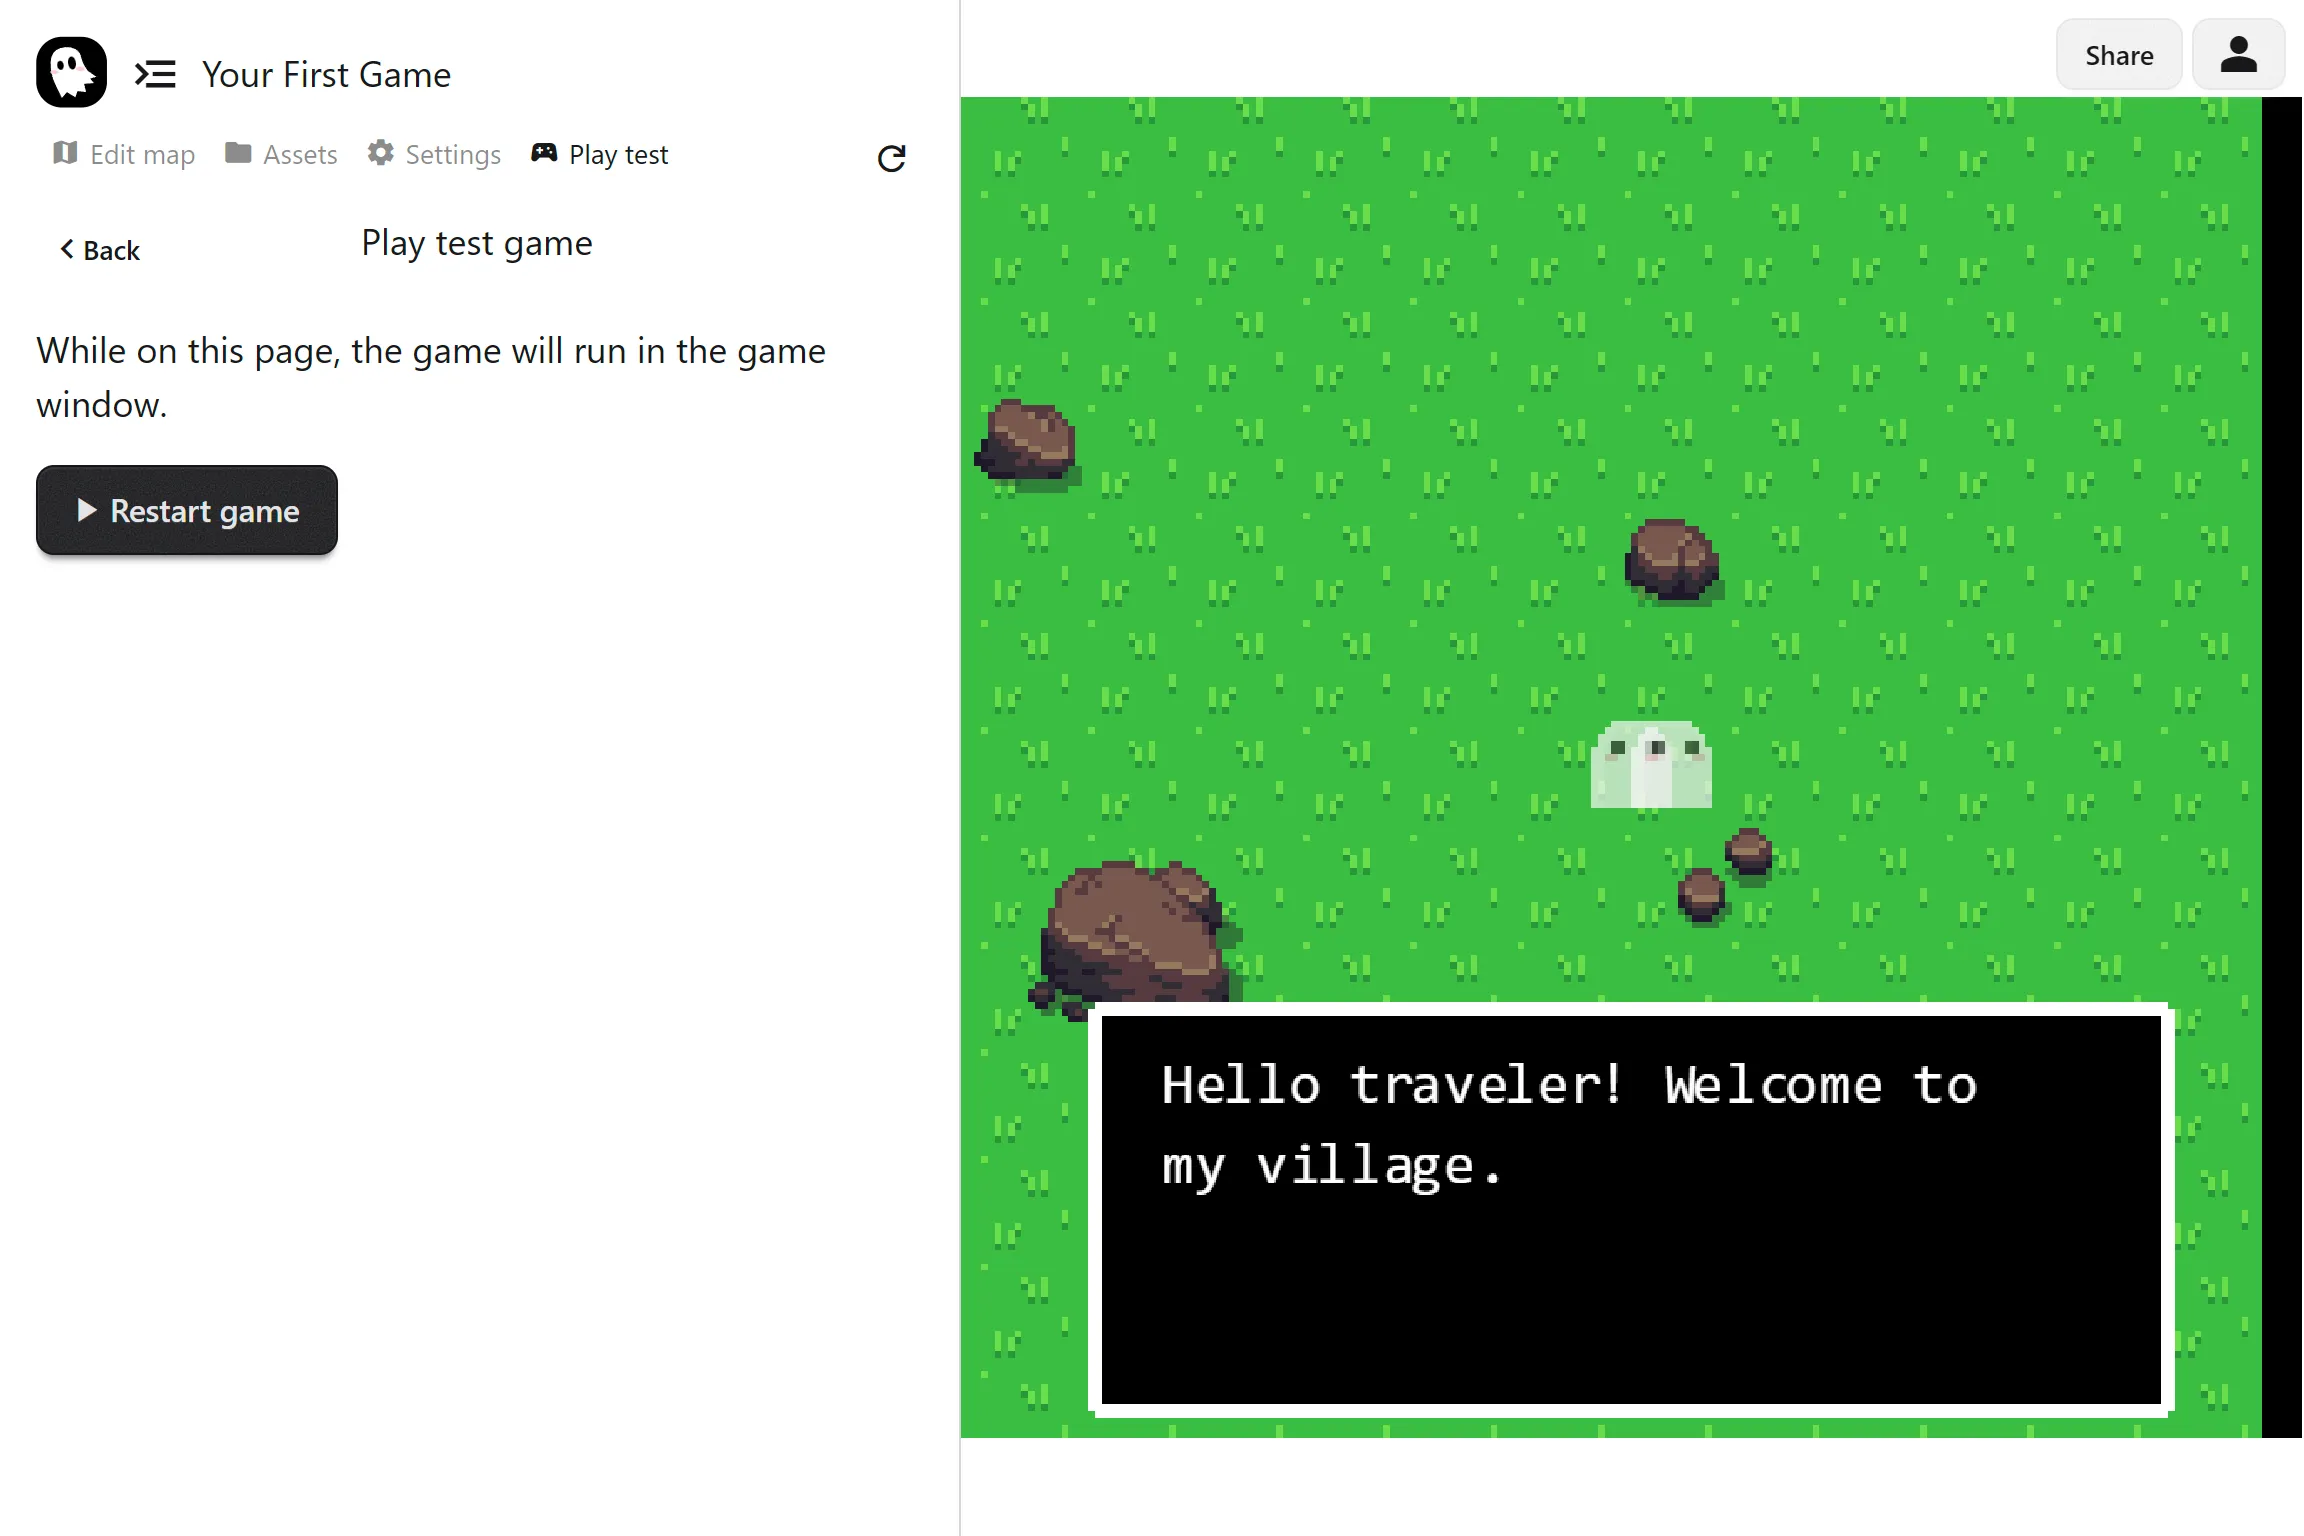
Hello traveler! Welcome to my village.[pb]It’s dangerous to go alone...The special tag [pb] continues the message in a new dialogue box.
Add the Trigger
Section titled “Add the Trigger”- Back in the event group, click on Add to map.
This adds an event to put the event group into the map. - Set the trigger to Interact.
- Set the trigger position to Attach to NPC, and onto “Ghost friend”
Now, in the Play test page, when you walk up to the NPC and press Enter or Z, the dialogue will play.
Sharing Your Game
Section titled “Sharing Your Game”Click Share at the top right to copy a link. Send it to friends so they can play your creation instantly in their browser.
What’s Next?
Section titled “What’s Next?”You now know the basics of maps, NPCs, and events. From here, the fun begins!
The rest of the docs has a lot of good information. Try building more maps, playing with the event system, and seeing how different mechanics come together. The more you experiment, the more you’ll discover what possible in PS Maker.
Here are a few good next steps:
- Tilesets: Add terrain and shape the foundation of your world
- Autotiles: Speed up map design with smart borders and corners
- Event System: Learn how to create dialogue, choices, and gameplay mechanics
- NPCs: Bring characters to life with animations and interactions
Have fun building maps, exploring the event system, and creating stories that are uniquely yours!
Join our Discord community if you’d like help or want to share what you’ve built!